Event Systems in Roblox Lua (Part 1 – The Problem)

Hey everyone. Lately I’ve been considering the many ways to create event systems for Roblox Lua. You may already be familiar with native events, a.k.a. RBXScriptSignal, in Roblox. You connect your function to one of these, and when the engine detects the occurrence, it calls your function with the relevant arguments. BasePart.Touched is one of the most common examples.

But what if you’re making your own objects, like in my object-oriented programming tutorial? If your custom objects want to define events, you have a ton of different options for implementing this pattern. In this tutorial series, I will explore the different methods you can use to implement an event-listener pattern.

Before we look at the different ways we could create a system like this, let’s define exactly what we’re trying to code up. We want to be able to create an event and connect any number of functions to it. In addition, we want to send arguments to the connected functions when this event is fired. Finally, we need to be able to disconnect a connected function from this event. So, no matter what systems we end up making, we should be able to do something like this (for example, in a round-based game):

local function announceGameOver(finalScore)
	print("Game over!")
	local message = Instance.new("Message")
	message.Text = "Game over! Your score: " .. finalScore
	message.Parent = workspace
	wait(2)
	message:Destroy()
end

local function cleanUpTheGame()
	-- Destroy the map if we have one
	if workspace:FindFirstChild("Map") then
		workspace.Map:Destroy()
	end
	-- Clean up any debris on the ground
	while workspace:FindFirstChild("Debris") do
		workspace.Debris:Destroy()
	end
end

local onGameOver = Event.new()
onGameOver:connect(announceGameOver)
onGameOver:connect(cleanUpTheGame)

-- ...somewhere else in your code...
onGameOver:fire(69)

A couple things to note:

  • It ought not matter in which order our functions announceGameOver and cleanUpTheGame will run; in a perfect world we’d have them happen at the same time. (In reality, one will always happen before the other and it’s the order in which we connect these functions that may ultimately play a part in what order they are actually called.)
  • Not all connected functions will need to use all the arguments sent by the event, such as cleanUpTheGame  not needing the final score we sent.
  • Not all connected functions will need to stay connected – we might need to disconnect functions as a cleanup measure.
  • For brevity, I will be skipping over writing a wait method to yield until an event is fired.

With those things in mind, let’s see the different ways we can make event systems in Roblox Lua!
Click here to proceed to part 2 of this tutorial series.

Object Oriented Programming in Lua (Part 4 – Clean-up)

This final part of this tutorial series will talk about some ways to clean up the example from the previous part and apply it to Roblox. First thing’s first: let’s move the entire Car class defintion into its own ModuleScript called “Car” inside ServerScriptService. Now we can combine the CarMetatable and CarMethods into a single table. Just have __index refer to the table itself. Let’s call the table Car.

local Car = {}
Car.__index = Car

Next, we can package the newCar constructor into this table. Remember that setmetatable(t, mt) returns the table t whose metatable we are setting in the function call. The constructor can be simplified to just this:

-- Old constructor
function newCar(color)
	local car = {}
	car.color = color
	car.speed = 0
	setmetatable(car, CarMetatable)
	return car
end

-- Brand-new simplified constructor
function Car.new(color)
	return setmetatable({
		color = color;
		speed = 0;
	}, Car)
end

Notice that we are creating the new object table inside the setmetatable  function, which will both set the metatable and then return it from the constructor. Finally, we fix the method definitions as well.

-- Such honk, much beep, wow.
function Car:honk(self)
	print("Beep beep!")
end

-- Vroom vroom, what a clean looking method!
function Car:accelerate()
	self.speed = self.speed + 20
end

Since this is inside a ModuleScript, return the Car table on the final line.

return Car

Since we are creating objects, we can make many of them at once with all unique identitiesstates and methods. Here’s an expansion of the previous part’s examples. This should go in a script somewhere inside your game.

local Car = require(game.ServerScriptService.Car)

local ferrari = Car.new("red")
local bugatti = Car.new("blue")

ferrari:honk()
bugatti:honk()

ferrari:accelerate()
bugatti:accelerate()

print("My Ferrari is going " .. ferrari.speed .. " miles per hour")
print("My Bugatti is going " .. bugatti.speed .. " miles per hour")

And that’s it! You should download the code for the Car class and example script. Play around with creating your own classes. It’s a lot of fun and you’ll find object oriented programming is a fantastic way to make your code more organized. If you have questions, send me a direct message on Twitter or a message on Roblox.

Object Oriented Programming in Lua (Part 3 – Examples)

In this section, we will apply the information from the last two sections into an actual example. Let’s implement a Car class in which we will make Car objects. Cars have a state (like their color or speed) as well as behavior like accelerating or honking the horn. We will create fields and methods for both of these.

We start by defining a car metatable and a table of car methods. We set the __index  metamethod so when a new car object is given this metatable, we can access our methods through it.

-- The metatable for future car objects
local CarMetatable = {}
-- The table of car methods (functions)
local CarMethods = {}
-- Set the __index metamethod of the metatable
-- so that we can access the car methods through
-- car objects.
CarMetatable.__index = CarMethods

Next, we write a function to create a new car of a certain color and set the metatable properly. Additionally, we can initialize the speed field to zero. A function like this is called a constructor.

function newCar(color)
	local car = {}
	car.color = color
	car.speed = 0
	setmetatable(car, CarMetatable)
	return car
end

Excellent, now write some methods for the car, like acceleration and honking the horn. Store these in the CarMethods  table. Remember that we’re going to call these methods with colon syntax, so the first argument is going to be the car we’re working with. Let’s call this first parameter self .

CarMethods.honk = function (self)
	print("Beep beep!")
end

An important thing to mention here is that the following function definitions are all equivalent:

-- A good way to define a method
CarMethods.accelerate = function (self)
	self.speed = self.speed + 20
end


-- A better way to define a method
function CarMethods.accelerate(self)
	self.speed = self.speed + 20
end

-- The cleanest way to define a method
function CarMethods:accelerate()
	self.speed = self.speed + 20
end

For the last one, we are defining the function with a colon! This tells Lua that we’re going to implicitly create a local variable called self  which refers to the first argument to the function. Conveniently, when we call the method with the colon syntax, self is automatically filled with the car in question.

And this is all we need to have something workable. Create a new car with the newCar  function and use some of its methods (don’t forget to use a colon instead of a period)!

local ferrari = newCar("red")
ferrari:honk()
ferrari:accelerate()
print("My Ferrari is going " .. ferrari.speed .. " miles per hour")

In the next article, we’ll talk about ways to clean up this code more.

Click here for Part 4 of this tutorial series.

Object Oriented Programming in Lua (Part 2 – Metatables)

Part 2! This is all about metatables, which will be the main tool to implement OOP in Lua. Metatables, put simply, are Lua tables that describe the behavior of other Lua tables. You can use getmetatable(tab)  and setmetatable(tab, meta)  to manage a table’s metatable:

local my_tab = {}
local my_metatable = {}
setmetatable(my_tab, my_metatable)

Now that you’ve set a table’s metatable, you can now set metamethods. These are special keys in the metatable that define specific behavior when set to a function, for example: __index , __add , __sub , __tostring , __eq and others. Notice how their names all being with two underscores (_). These metamethod functions are called when you do things with the table in question. It’s important to take time and read up on the behavior of each metamethod on your own, like how __add  is called when you add two tables with the same metatable.

We’ll be using __index to implement classes and objects. This metamethod is called when you try to index a key (doing tab[key] or tab.key, remember these are equivalent) that hasn’t been set in a table yet:

local my_tab = {}
local my_metatable = {}
setmetatable(my_tab, my_metatable)

-- Set the __index metamethod:
my_metatable.__index = function (tab, key)
	print("Hello, " .. key)
	return "cruel world"
end

-- Trigger the __index metamethod:
print("Goodbye, " .. my_tab["world"])

In the above example, the goodbye print statement attempts to index world in my_tab . Since that key hasn’t been set in my_tab  (it is nil), Lua calls our __index  function with  my_tab  and world as arguments. The function returns the string cruel world , which is returned to the goodbye print statement. This code will output:

Hello, world
Goodbye, cruel world

This example is pretty crucial to understand what’s going on behind the scenes and why. A key feature of __index is that you don’t have to set it to a function. You can also set it to another table instead! The behavior is now as follows: if you index something that isn’t in the table, it checks the table in __index instead (like a backup table).

Why is this important? For our objects, we will be creating a table of the functions (methods) that every object of one kind should have. We’ll set the metatable of the objects to equal this table of functions so that we don’t have to copy functions over to every instance of an object when it is created.

However, before we get to that, we have to understand colon syntax for method calling (remember that a method and a function are essentially the same, except that the word method is used in the context of OOP). In Roblox Lua, you are required to call methods like Destroy by using a colon. How is this different from using a period? When you use a colon in a method call, Lua sends the table itself (the left of the colon) as the first argument to the function. For example, if you had a table foo  with a function bar , then calling foo:bar()  is the same as foo.bar(foo) . More info about this behavior can be found in Chapter 16 of Programming in Lua. It’s syntax sugar.

When you use a colon in a method call, Lua sends the table itself (the left of the colon) as the first argument to the function.

-- Define a table foo with a function bar inside it
local foo = {}
foo.bar = function ()
	print("Hello, world")
end
-- These lines are equivalent.
foo.bar(foo)
foo:bar()

Let’s put this all together: we can store our object’s methods (functions) inside a table. We set this table as the __index  for the metatable of newly created objects. We call these methods using colon syntax so our functions can access the object we’re talking about. In the next article, we will take all these abstract topics and apply the concepts to concrete examples.

Click here for Part 3 of this tutorial series.

Object Oriented Programming in Lua (Part 1 – Concepts)

Hi everyone! This multi-part tutorial is all about object-oriented programming (OOP) in Lua. In later parts, I’ll apply this information to Roblox Lua. For this tutorial, you should be fairly comfortable with Lua tables. If you’re new or rusty, read this chapter from Programming in Lua. You’ll learn what metatables are and how they can be used to simulate OOP in Lua. Many of the concepts you’ll see here are applicable to other programming languages, namely Java or C#. If you’re going into computer science later in life, this is good to expose yourself to early.

Let’s first talk about what object-oriented programming means: programming involving the use of objects. But what’s an object, really? For the purposes of OOP, it is something that represents a real thing, and it has these three distinct qualities:

Identity

The object is distinctly identifiable or different from similar objects.

Examples
  • Cars are different even if they’re the same make, model and color.
  • Players are different even if they share a score or chat the same messages.

State

The object describes its present qualities represented using fields.

Examples
  • A car’s make, model or speed
  • A player’s name or score
  • A button’s text and if it is disabled

Behavior

The object describes what actions it can perform using methods.

Examples
  • A car can turn on its engine, accelerate and honk its horn
  • A player can connect to a game, earn points, and chat
  • A button does something when it is clicked

To Roblox scripters, all this should really familiar! Every object that you’ve used follows this model:

The words “Part” and “ParticleEmitter” are the names of classes, which can be described as a blueprint, template or contract for what an object is. These blueprints define the fields and methods by which objects’ state and behaviors are identified.

For now, that’s all the theory you need to understand! In the next article will talk about metamethods and some Lua syntax subtleties that will help us implement classes.

Click here for Part 2 of this tutorial series.

Scripting Dice on Roblox

Hi everyone! This is going to be a tutorial on scripting dice using Roblox Studio. Let’s start by creating the dice model.

dice
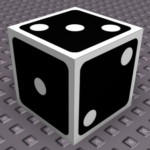
The dice model we’re going to create.

Creating the Dice Model

If you’re already comfortable using Roblox Studio to build things, you can skip this part and grab the Model off Roblox here.

  1. Create a 4×4 part.
  2. Color the dice white. Set the Top and Bottom surfaces to Smooth.
  3. Add the following decals: Top (3), Bottom (4), Front (1), Back (6), Left (2), Right (5). Credit to game-icons.net for the dice face images. Remember, opposite face values of a dice will add to 7.
  4. Add a new Script to the part, as well as a StringValue named Face and an IntValue named Roll. We’ll use these as the output for our script.
tree
The dice’s hierarchy should look like this.

Scripting the Dice

Now for the fun part. Let’s start by getting some variable references to the objects in the game hierarchy (visible in the Explorer window). Remember to open the Output window when scripting! Small note: Unless otherwise mentioned, the given code should be added from top to bottom in the script.

local dice = script.Parent
local vFace = dice.Face
local vRoll = dice.Roll

Next, let’s define a function called getHighestFace(part) which will determine the highest face of given part and return it.

local function getHighestFace(part)
	local highestFace
	local height = -math.huge
	
	-- For each NormalId (Top, Bottom, Front, Back, Left, Right)
	for k, normalId in pairs(Enum.NormalId:GetEnumItems()) do
		local y = part.CFrame:pointToWorldSpace(Vector3.FromNormalId(normalId)).y
		if y > height then
			highestFace = normalId
			height = y
		end
	end
	
	return highestFace
end

What’s going on here: We’re going over each NormalId (Top, Bottom, Left, etc). For each of these, we get a Vector3 value from the NormalId using Vector3.FromNormalId so Top translates to (0, 1, 0), Bottom is (0, -1, 0), etc. Then we’re transforming that point, which is a point local to the given part’s CFrame, into world space using pointToWorldSpace. Finally, we’re getting the Y component (height) of the resulting world point.

The rest of the this function is simply finding the face that gives the highest world point. There’s the meat of the program – now let’s hook it up into something practical by writing an update function that uses the getHighestFace function.

local function update()
	local highestFace = getHighestFace(dice)
	vFace.Value = highestFace.Name
end

This is simple enough: get the highest face of the dice, then stuff it into the Face StringValue. We’ll revisit this function later to determine what number is on what side of the dice. For now, we’ll use this line to connect the update function with the RunService‘s Stepped event, which fires about 30 times a second when the game is unpaused.

game:GetService("RunService").Stepped:connect(update)

You could also add a while-true-do loop and update on your own frequency if you wanted. Test your script by pressing play, then rotating your dice. If the Face StringValue’s Value changes accurately based on the highest face, then you’ve done got the basis of your dice! If not, check the Output window for any red error messages or yellow warnings. One little typo can mess up the entire script!

If your dice is working properly, let’s go back and update the update function so that it determines which number is on what side of the dice. Add this to the top of your script:

local faceValues = {
	Front = 1; Back = 6;
	Left = 2; Right = 5;
	Top = 3; Bottom = 4;
}

This is a table we’ll use to look up values of the dice decals that are on whatever side of the part is highest. Update your update function to this:

local function update()
	local highestFace = getHighestFace(dice)
	vFace.Value = highestFace.Name
	vRoll.Value = faceValues[vFace.Value]
end

This will stuff the current face’s value into the Roll IntValue. This way, another script in your game could read the current dice roll without having to do any math.

And that’s it! Go ahead and play around with your dice in Play mode and make sure each side corresponds to the correct value. If not, you might have to switch some values in the faceValues table. If none of your values are changing, check the Output for errors.

Here’s the completed dice model in case you got stuck or lost.

dice