Object Oriented Programming in Lua (Part 1 – Concepts)

Hi everyone! This multi-part tutorial is all about object-oriented programming (OOP) in Lua. In later parts, I’ll apply this information to Roblox Lua. For this tutorial, you should be fairly comfortable with Lua tables. If you’re new or rusty, read this chapter from Programming in Lua. You’ll learn what metatables are and how they can be used to simulate OOP in Lua. Many of the concepts you’ll see here are applicable to other programming languages, namely Java or C#. If you’re going into computer science later in life, this is good to expose yourself to early.

Let’s first talk about what object-oriented programming means: programming involving the use of objects. But what’s an object, really? For the purposes of OOP, it is something that represents a real thing, and it has these three distinct qualities:

Identity

The object is distinctly identifiable or different from similar objects.

Examples
  • Cars are different even if they’re the same make, model and color.
  • Players are different even if they share a score or chat the same messages.

State

The object describes its present qualities represented using fields.

Examples
  • A car’s make, model or speed
  • A player’s name or score
  • A button’s text and if it is disabled

Behavior

The object describes what actions it can perform using methods.

Examples
  • A car can turn on its engine, accelerate and honk its horn
  • A player can connect to a game, earn points, and chat
  • A button does something when it is clicked

To Roblox scripters, all this should really familiar! Every object that you’ve used follows this model:

The words “Part” and “ParticleEmitter” are the names of classes, which can be described as a blueprint, template or contract for what an object is. These blueprints define the fields and methods by which objects’ state and behaviors are identified.

For now, that’s all the theory you need to understand! In the next article will talk about metamethods and some Lua syntax subtleties that will help us implement classes.

Click here for Part 2 of this tutorial series.

Scripting Dice on Roblox

Hi everyone! This is going to be a tutorial on scripting dice using Roblox Studio. Let’s start by creating the dice model.

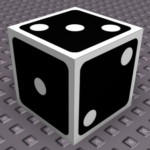
dice
The dice model we’re going to create.

Creating the Dice Model

If you’re already comfortable using Roblox Studio to build things, you can skip this part and grab the Model off Roblox here.

  1. Create a 4×4 part.
  2. Color the dice white. Set the Top and Bottom surfaces to Smooth.
  3. Add the following decals: Top (3), Bottom (4), Front (1), Back (6), Left (2), Right (5). Credit to game-icons.net for the dice face images. Remember, opposite face values of a dice will add to 7.
  4. Add a new Script to the part, as well as a StringValue named Face and an IntValue named Roll. We’ll use these as the output for our script.
tree
The dice’s hierarchy should look like this.

Scripting the Dice

Now for the fun part. Let’s start by getting some variable references to the objects in the game hierarchy (visible in the Explorer window). Remember to open the Output window when scripting! Small note: Unless otherwise mentioned, the given code should be added from top to bottom in the script.

local dice = script.Parent
local vFace = dice.Face
local vRoll = dice.Roll

Next, let’s define a function called getHighestFace(part) which will determine the highest face of given part and return it.

local function getHighestFace(part)
	local highestFace
	local height = -math.huge
	
	-- For each NormalId (Top, Bottom, Front, Back, Left, Right)
	for k, normalId in pairs(Enum.NormalId:GetEnumItems()) do
		local y = part.CFrame:pointToWorldSpace(Vector3.FromNormalId(normalId)).y
		if y > height then
			highestFace = normalId
			height = y
		end
	end
	
	return highestFace
end

What’s going on here: We’re going over each NormalId (Top, Bottom, Left, etc). For each of these, we get a Vector3 value from the NormalId using Vector3.FromNormalId so Top translates to (0, 1, 0), Bottom is (0, -1, 0), etc. Then we’re transforming that point, which is a point local to the given part’s CFrame, into world space using pointToWorldSpace. Finally, we’re getting the Y component (height) of the resulting world point.

The rest of the this function is simply finding the face that gives the highest world point. There’s the meat of the program – now let’s hook it up into something practical by writing an update function that uses the getHighestFace function.

local function update()
	local highestFace = getHighestFace(dice)
	vFace.Value = highestFace.Name
end

This is simple enough: get the highest face of the dice, then stuff it into the Face StringValue. We’ll revisit this function later to determine what number is on what side of the dice. For now, we’ll use this line to connect the update function with the RunService‘s Stepped event, which fires about 30 times a second when the game is unpaused.

game:GetService("RunService").Stepped:connect(update)

You could also add a while-true-do loop and update on your own frequency if you wanted. Test your script by pressing play, then rotating your dice. If the Face StringValue’s Value changes accurately based on the highest face, then you’ve done got the basis of your dice! If not, check the Output window for any red error messages or yellow warnings. One little typo can mess up the entire script!

If your dice is working properly, let’s go back and update the update function so that it determines which number is on what side of the dice. Add this to the top of your script:

local faceValues = {
	Front = 1; Back = 6;
	Left = 2; Right = 5;
	Top = 3; Bottom = 4;
}

This is a table we’ll use to look up values of the dice decals that are on whatever side of the part is highest. Update your update function to this:

local function update()
	local highestFace = getHighestFace(dice)
	vFace.Value = highestFace.Name
	vRoll.Value = faceValues[vFace.Value]
end

This will stuff the current face’s value into the Roll IntValue. This way, another script in your game could read the current dice roll without having to do any math.

And that’s it! Go ahead and play around with your dice in Play mode and make sure each side corresponds to the correct value. If not, you might have to switch some values in the faceValues table. If none of your values are changing, check the Output for errors.

Here’s the completed dice model in case you got stuck or lost.

dice

Kicksticuffs: April Fools’ Day Review

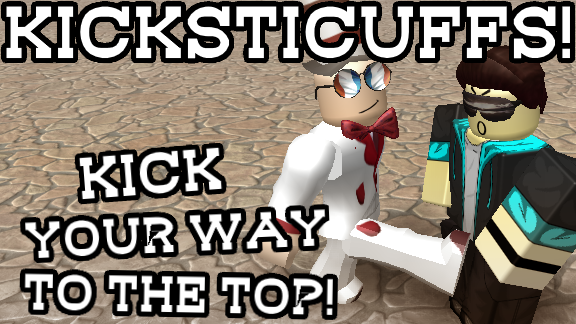
thumbnail_kickHello! I wanted to give a brief review on the update to Fisticuffs! I made last Friday in celebration of April Fools’ Day. The update changed the entire theme of the game from punching to kicking – Kicksticuffs! Overall, the update was pretty well-received and visits increased the three days the update was live and I got some interesting feedback in the process.

The update was done a bit quickly as I thought of this on April Fools’ Day. I created a kicking animation and swapped out the animations in the punching scripts. I changed the hitbox from the punch tool’s invisible handle to the character’s right leg, and presto, I now have a kicking tool. All the punch types (er, kick types) maintained their same mechanics. I also redid all the strings and logos to use “kick” instead of “punch”.

The hitbox turned out to be a bit wonky. It wasn’t as consistent as the punch due to the fact the punch tool’s handle extends farther out than the ROBLOX’s character’s arm and is also thicker. Reducing that to just the leg made dealing damage a lot less consistent.

I also got lazy and didn’t realize the Super Punches didn’t override the animations properly and ended up still doing punches. I received a couple complaints that people were still punching and that they were performing better than those who were relegated to kicking. Unfortunately, I did not collect any data with regards to punch type performance during the Kicksticuffs period.

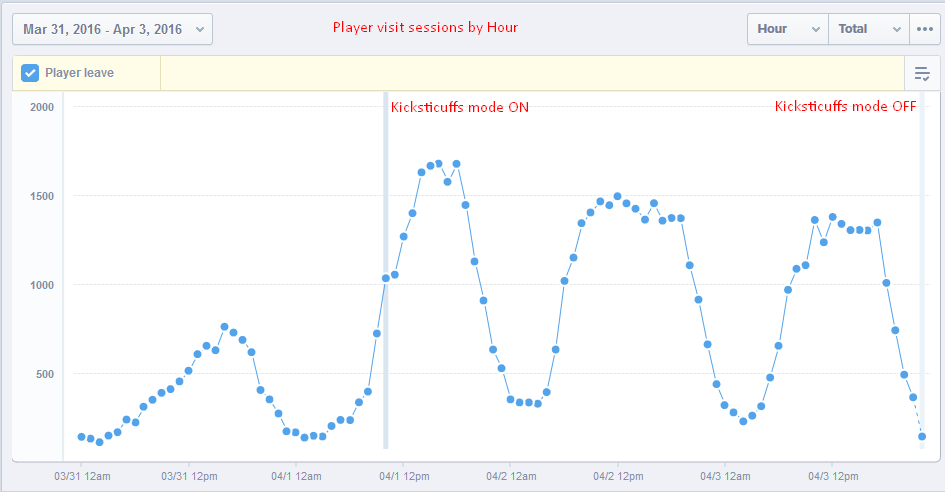
Speaking of data, the weekend of kicking brought 60% more game play sessions. Sweet! Unfortunately, the average play time took a dip of about 35% because players were only showing up to do a bit of kicking, then leaving for the regularly scheduled April Fools’ hijinks elsewhere. I was surprised to see that Friday (a weekday) beat out the Saturday and Sunday in max visits in one hour. It’s rare to see that happen, but not as rare as an update like kicking in a punching game.

Screenshot_91For those who really liked the kicking, I will be creating a cheap game pass that will turn kicking on for the buyer. Before that pass is released, the kicking hitbox issues will be fixed to give the consistency of punching. I don’t foresee any balancing issues with kick types, with the exception of Super Punches: kicking will be disabled for them due to animation replacement code being spaghetti necessary readability for that specific punch type.

All in all, the short-lived update went well, but I regret not doing some more preplanning to get the game a larger burst in popularity. It could have been much bigger. I wasn’t able to advertise the game using the doomed tickets currency, for some odd reason (my bids weren’t going through).

That’s all for now!
– Ozzy

Juggernaut 2: Jump Limits

Jumping around in the redone lobby of Juggernaut 2.
Jumping around in the recently redone lobby of Juggernaut 2.

Jumping. It’s an intrinsic mechanic to ROBLOX games that involve the default character figure. Unfortunately, jumping is one of the most unhealthy mechanics to have in a game like Juggernaut 2 that involves projectile shooting. In this post, I discuss how I take control of this mechanic and make it healthy for Juggernaut 2.

Continue reading “Juggernaut 2: Jump Limits”

Juggernaut 2: Beginning the Remake

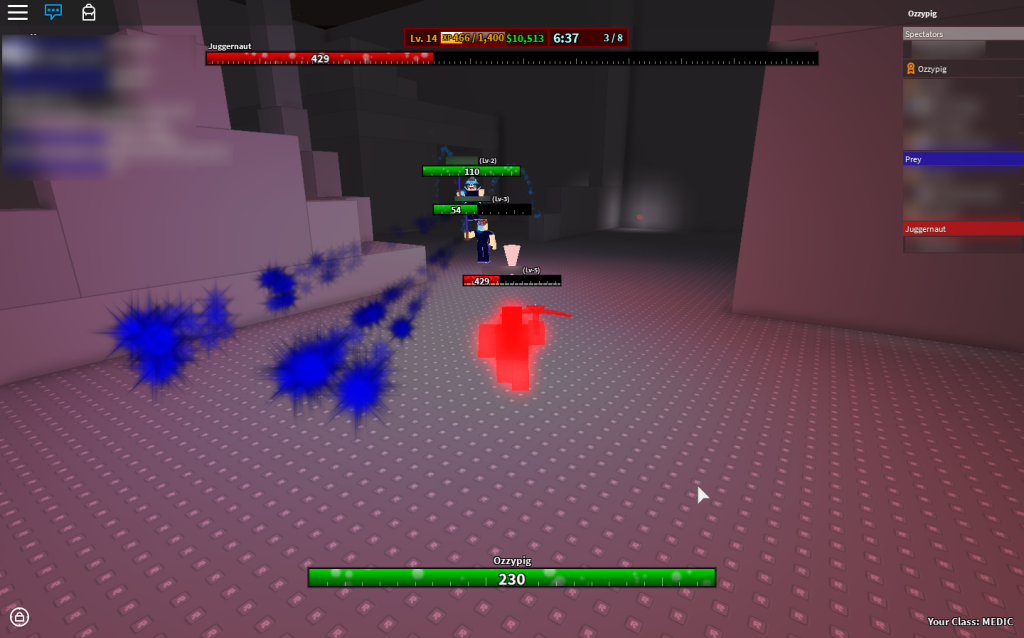
I’ll kick off my blog’s content with a post about my current project on ROBLOX. It is a remake of Juggernaut, my game from two years ago which won Best Co-op of 2013. Until now, the game was known as Project Naughty Wolf to keep it relatively unknown.

Screenshot of Juggernaut 2 development
Screenshot of a testing session of Juggernaut 2. Names and chat blurred for privacy.

Continue reading “Juggernaut 2: Beginning the Remake”

Hello, Internet!

Hello, everyone! Welcome to my shiny, brand-new blog!

I’m going to use this blog to take note of all my adventures in game design. This blog will be treated it like a public diary for anyone to read. I will record the fun challenges and subtleties that I come across when making my own games, and perhaps provide some commentary on the games that my peers are making. More specifically, my activities on ROBLOX will be documented here.

My previous website (the one I designed and coded myself from scratch) can still be found at https://ozzypig.com/old. I’m not sure how long I will keep it up, but I will merge some of the more important information to pages on this WordPress blog.

If you’re also a game developer on ROBLOX.com, then you’ll want to keep an eye on this blog. Or rather, if you’re a game player on ROBLOX, you might also want to read to see how there is more to ROBLOX games than meets the eye. Whether a game player or game designer, I promise you that what you’ll find here will be pertinent to your interests.

So, if you’re ready, take a journey with me. I’m sure it will be a wild one.

-Ozzy

P.S.: A quick disclaimer: I don’t claim to be extremely knowledgeable on game design or writing. I will allow my ethos to speak for itself. My thoughts may not always come out clearly, but I always strive to be more concise. I’ve passed college-level writing courses, so hopefully they will serve me well as I try to communicate my thoughts.